Grade 6
 |  |
Using a 1 x 1 gum eraser, students learned how to make a relief print.
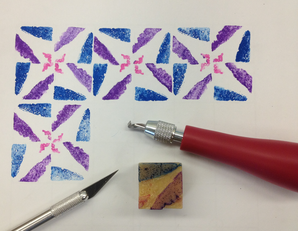
The design process started with a few simple thumbnail sketches. Then students selected their best design to draw on a gum eraser with a permanent sharpie marker. The negative space (empty or blank areas) were carved out with cutting tools - linoleum cutters and/or an exacto knife. The uncut (or raised up) parts of the eraser create the relief print. Using washable markers on the relief area of the stamp, students planned a color scheme and started to practice printing and creating a variety of patterns on their paper. To help line up the stamps, a guide or grid sheet was used.
In most cases students selected to do radial balance. This means each stamp was repeated 4 times and rotated around a central axis. The end result creates patterns like we would see in bathroom or kitchen tiles. The hand crafted, Talvera tiles from Mexico are a popular decorating material you would find today and are also used to decorate stair cases. The interesting patterns and colorful designs add a bit of pop here and there.

 RSS Feed
